Tuesday 26 April 2011

Worth the Wait


I started this cardigan, the Must Have Cardigan, in May 2009. I finished the back and started the sleeves by the end of that summer, and then we moved, and I didn't touch it for the whole of 2010. I restarted it this year in March and finished it at the weekend. I love it!

The buttons are from The Textile Garden, I bought them at the Ravelry Day in Coventry in 2009.


Sunday 10 April 2011

The Vegetable Garden - April


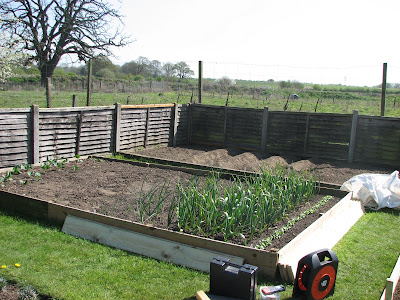
The vegetable garden is really taking shape now, and the wonderful weather we have had for the last week, and the longer evenings, have meant we can get out into the garden for longer and get a lot of weeding done.

On the right you can see the raspberry canes and the strawberry patch; and the second raised vegetable bed is now under construction. This will have peas, beans, pumpkins and squashes in it this year.


On the left at the back are the mounds where the first early potatoes have been planted. We're trying Arran Pilot this year. This bed is also destined to have sweet corn, broccoli and cauliflower in due course. In the raised bed, spring greens/cabbages, onions and garlic and some radishes. Carrots and parsnips will go in the middle.


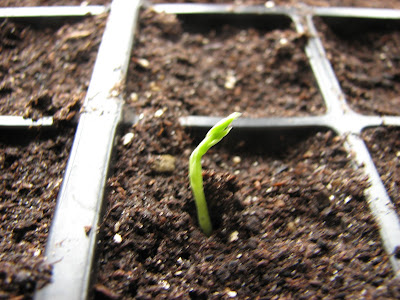
The greenhouse is now in use, with tomatoes, peppers, chillis and basil on the staging, and on the left are seed trays in which I have just sown the squashes, pumpkins and courgettes, some more sweet peas and marigolds and salvias for summer bedding.


The new trees have leaves! which is very exciting.


Wandering into the front garden, there are already some new flowers in the last couple of weeks:
scarlet tulips, and the first bluebells (and can you spot the Heuchera pushing its way through the patchof bluebell leaves there).


The beautiful creamy blossoms of Viburnum;


and this lovely white-flowered cascade, in the shady bed where I have also just found my hostas coming through. They were smothered in weeds, but are actually doing quite well. A bit more weeding needed here, and I also have some Convallaria and some Hellebores to plant.


Sunday 27 March 2011

The Flower Garden - March


Time for me to take some photos of how the garden is looking this month, so we can see, at the end of the year, which parts of the flowerbeds could be improved and how to get the best from each season.

There is a lot going on in all the flowerbeds at the moment, the front garden has most flowers, with a lovely show of daffodils and muscari.


There are lots more bulbs coming up and the aubretia is just getting going as well.


Elsewhere, it is mostly leaves emerging for the new season so far.


In the back, there are some lovely tulips now in flower and the alliums we planted last year are coming up but of course not yet flowering, and the primroses I planted in containers are starting to look very pretty too.

Sunday 13 March 2011

Apple Trees


As we arrived home at lunchtime on Friday, I said to Braveheart - I wonder when our apple trees will arrive? They are supposed to come between mid-Feb and March. I think I'll phone Thompson and Morgan and see when they are planning to dispatch them.

About an hour later, before I had got around to making my phone call, there was a knock at the door and a UPS guy delivered a HUGE tall box with three apple trees in.


So when we had finished putting the louvres and the last pane of glass in the greenhouse, we set about planting our new apple trees. First we faffed about for a while trying to remember where we had planned to put them. After a lot of measuring and placing of plant pots we settled on three locations which left a suitable space for a fourth tree in due course. We also had ready three large tree stakes, three tree ties, some bags of manure and a bag of bark chippings.


We marked out the edges of each hole as a 2 foot diameter around the tree and cut away the turf. Then we began digging. We measured the depth of the planting hole by placing the tree in the hole and checking that the earth would come up to its previous planting mark with some space for a layer of bark chippings. Once dug, we poured in a can of water and left it to soak away while Braveheart hammered in the stake.


Then we added some manure to the earth in the bottom of the hole, and some Root Grow, before placing the tree in the hole and filling it with earth to the correct depth.


Finally bark chips were added, and the tie was attached to tree and stake.


Our trees are a Bramley, a Braeburn and a Cox's Orange Pippin.

Meanwhile, indoors, the seeds I sowed last weekend are doing well. Tomatoes,
Broccoli and Sweet Pea seedlings are all growing well.


Monday 7 March 2011

Greenhouse Progress


Since my last post on the greenhouse project, we have worked on the construction whenever we had spare time and it wasn't raining, which unfortunately wasn't as often as we would have liked.

We opened up the boxes with the greenhouse bits in and laid out all the pieces on the patio. We counted every single item and checked it off against the parts list!


The first step was to assemble the front, back and sides separately.


Then we put them together and added the roof section.


The greenhouse at this stage is very light, so we carried it carefully across the lawn to its final location, where we placed it into its base, and checked that everything was squared up and that it all fitted.

The foundation was completed with a path, gravel around the edges and we dug over the vegetable beds which will be inside.


Then we fastened everything down.


The final stage was to make up the door and window vents, and to put the glass on. This took a surprisingly long time, and we have so far completed the roof. This morning our new glass roof was covered in frost! It seems to have survived, though.

Sunday 20 February 2011

The Flower Garden - February


This year I've decided to take photos of the various flower beds each month so I have a record of what is in flower throughout the year and can use that to decide if I want to change the plantings. This month the snowdrops are out and tiny miniature daffodils are just opening. One thing I can see is that it would be nice to have more snowdrops in thicker groups, so I've begun moving them into clusters as I weed. I think I will plant some more groups for next year, as well.


There are lots of bulbs coming up all over the garden, so in a few weeks there should be a big change in the flower garden with a lot more flowers coming into bloom.


Saturday 12 February 2011

Planning Ahead

Although it's still winter, we have started planning for Spring. I'm very excited about Spring this year, and about the garden. This time last year we were still unpacking boxes every weekend, and my entire collection of clothes was stored in a heap of black bin liners handily stacked beside the mattress on the bedroom floor which was our temporary bed.

By the time we turned our attention to the garden, we were late planting most things and all the flowerbeds were out of control. It took us all year to get things back in some kind of order. We did have some successes with vegetables, and also some less successful crops, so we've got new ideas for 2011 as well as some old favourites.

This year we are planning well ahead, and looking forward to starting the growing year right at the beginning of Spring. The key to all this is our new greenhouse!

The greenhouse itself is flat packed and is currently waiting patiently on the patio. For the last few weeks we have been working on constructing the foundations. We decided to make these using concrete paving slabs. The first step was to take the greenhouse base measurements from the instructions and use those to produce a scale drawing of the foundations. The drawing enabled us to see how many slabs of each size we needed and to order them.

The garden is not level, so the base has had to be measured, dug out and levelled.
First the area was marked out according to the plan and the turf was removed.


Then the area was dug over and levelled out, which left some sides higher than others. We decided to put a wooden edging all around to make sure that the edges didn't cave in. To do this the area had to be enlarged and then the edging had to be hammered in with a mallet.

Finally, using sharp sand a level bed was made for each paving slab and then the slabs were carefully placed. At each step the measurements were checked to ensure that when we reached the end there would be enough room for the last slab, that the base was square at all corners and that the base and slabs were level. We invested in the biggest spirit level I have ever seen and it has been one of the most useful tools for this job.


This has taken a month at weekends, but the result now looks a bit like the foundations of a ruined Roman Temple! Some of the slabs need to be levelled a tiny bit more, and we need to put sand in the gaps and some gravel at the back of the slabs, but then we will be ready for stage two - putting up the greenhouse!